table{ margin: 0 auto; width: 100%; clear: both; border-collapse: collapse; table-layout: fixed; // ***********add this word-wrap:break-word; // ***********and this}table{ margin: 0 auto; width: 100%; clear: both; border-collapse: collapse; table-layout: fixed; // ***********add this word-wrap:break-word; // ***********and this}The following code worked for me (added before the “location ~ \.php$ {“-part:
location /phpmyadmin {
            root /usr/share/nginx/html;
            location ~ ^/phpmyadmin/(.+\.php)$ {
                    try_files $uri =404;
                    root /usr/share/nginx/html;
                    fastcgi_pass unix:/var/run/php5-fpm.sock;
                    fastcgi_index index.php;
                    fastcgi_param SCRIPT_FILENAME $document_root$fastcgi_script_name;
                    include /etc/nginx/fastcgi_params;
            }
            location ~* ^/phpmyadmin/(.+\.(jpg|jpeg|gif|css|png|js|ico|html|xml|txt))$ {
                    root /usr/share/nginx/html;
            }
    }
Just make sure to adjust the three “root” locations to the folder where your “phpmyadmin” folder is in (the location of my phpmyadmin folder is here: “/usr/share/nginx/html/phpmyadmin”
========
Its work like a charm!!!
In this Linux How to’s tutorial we will install and configure the latest version of phpMyAdmin 4.4.9 to handle the database administration of MySQL, MariaDB and Drizzle servers over the web. It’s the best web based administration tool mainly for the beginner’s and for those who don’t feels comfortable with the command line administration. Its written in php so provides the intuitive web interface and supports most of the MySQL features to create and drop databases, create/drop/alter tables, delete/edit/add columns, execute any SQL statement and to manage indexes on columns.
We are going to install phpMyAdmin version 4.4.9 on the basic environment of Linux operating system with Nginx web server using MySQL’s Maria DB database and PHP. So, before starting the installation and configurations of phpMyAdmin make sure that you had already setup the LEMP Stack.
Check the status of Prerequisites that their services are enabled and running as we are going to install phpMyAdmin 4.4.9 under the following LEMP stack environment.
Linux
[root@CentOS-7 ~]# cat /etc/centos-release
CentOS Linux release 7.1.1503 (Core)
ENginx
[root@CentOS-7 ~]# nginx -v
nginx version: nginx/1.8.0
MySQL MariaDB
[root@CentOS-7 ~]# mysql -V
mysql Ver 15.1 Distrib 5.5.41-MariaDB, for Linux (x86_64) using readline 5.1
PHP
[root@CentOS-7 html]# php-fpm -v
PHP 5.4.16 (fpm-fcgi) (built: Oct 31 2014 13:01:14)
Copyright (c) 1997-2013 The PHP Group
Zend Engine v2.4.0, Copyright (c) 1998-2013 Zend Technologies
After we had confirmed that our basic environment to setup phpMyAdmin installation is fine, let’s proceed with the following steps to setup phpMyAdmin.
STEP 1: Download phpMyAdmin 4.4.9 Package
Many operating systems already includes with its package but unfortunately in CentOs 7.1 its not available by default in its repositories. So we can install it with two different methods, one is to enable the EPEL repository first and then install it using following YUM commands.
[root@CentOS-7 ~]#yum install epel-release
[root@CentOS-7 ~]#yum install phpmyadmin
The second method is to download the latest release from its official web link.
So, we will follow the second method to download the latest release of phpMyAdmin 4.4.9 in tar.gz package.
[root@CentOS-7 tmp]# wget http://sourceforge.net/projects/phpmyadmin/files/phpMyAdmin/4.4.9/phpMyAdmin-4.4.9-all-languages.tar.gz
STEP 2: Extract phpMyAdmin 4.4.9 Package
We will extract this .tar.gz package into the document root directory of Nginx to create its virtual host after that.
[root@CentOS-7 tmp]# tar zxvf phpMyAdmin-4.4.9-all-languages.tar.gz –C /usr/share/nginx/html/
[root@CentOS-7 tmp]# ls /usr/share/nginx/html/
phpMyAdmin-4.4.9-all-languages
Now change its name to a user friendly name with MV command. Let’s move html directory first and change its name as.
[root@CentOS-7 tmp]# cd /usr/share/nginx/html/
[root@CentOS-7 html]# vm phpMyAdmin-4.4.9-all-languages phpMyAdmin
[root@CentOS-7 html]#ls
[root@CentOS-7 html]#phpMyAdmin
STEP 3: Configure phpMyAdmin Virtual Host
In order to access phpMyAdmin over the web we need to configure its virtual host. Create an new file within the default configuration directory of Nginx.
[root@CentOS-7 ~]# cd /etc/nginx/conf.d/
[root@CentOS-7 conf.d]# touch vitual.conf
[root@CentOS-7 conf.d]# vim virtual.conf
server {
server_name 172.25.10.177;
root /usr/share/nginx/html/;location / {
index index.html index.htm index.php;
}location ~ \.php$ {
include /etc/nginx/fastcgi_params;
fastcgi_pass 127.0.0.1:9000;
fastcgi_index index.php;
fastcgi_param SCRIPT_FILENAME /usr/share/nginx/html/$fastcgi_script_name;
}
}
Before we go to web access of phpMyAdmin, open its document root directory and rename or copy its configuration file to configure it as per requirements.
[root@CentOS-7 html]# cd /usr/share/nginx/html/phpMyAdmin/
[root@CentOS-7 phpMyAdmin]# cp config.sample.inc.php config.inc.php
Now we can access the phpMyAdmin Web Administration console after restart of Nginx and php-fpm services with following commands.
[root@CentOS-7 phpMyAdmin]# systemctl restart nginx.service
[root@CentOS-7 phpMyAdmin]# systemctl restart php-fpm.service
after getting services active status we are now ready to open our web browser to access phpMyAdmin Web Console and login with the root credentials of our MySQL Maria-DB Server.
http://172.25.10.177/phpMyAdmin/
http://localhost/phpMyAdmin/

There are few missing configurations on the home page of phpMyAdmin Administration panel that we need to configure by making changes to the configuration file of phpMyAdmin. Let’s follow the two steps to complete these two missing configurations.

STEP 1: Add blowfish_secret passphrase
If you see the following error message at the bottom of your phpMyAdmin home page after your first login, then its means its missing Blowfish passowrd.

To figure out this problem just Open the configurations file of phpMyAdmin and add the encrypted password in front of blowfish_secret.
[root@CentOS-7 phpMyAdmin]# vim config.inc.php
$cfg[‘blowfish_secret’] = ‘5v}wtr0gDKnqOSDd8}nwzuoksuszpZNdLI-}2KE~n’; /* YOU MUST FILL IN THIS FOR COOKIE AUTH! */
STEP 2: Enabling Configuration Storage
This configuration is optional and should be disappeared after a refresh of page.

To recover from this error message we will uncomment below lines from the phpmyAdmin configurations file as set the control username and password.

According to above configurations now we will create a controluser and then import the database from the document root of phpMyAdmin using following commands.
To Create User
MariaDB [(none)]> create user ‘pma’@’localhost’ identified by ‘pma123’;
Query OK, 0 rows affected (0.00 sec)
MariaDB [(none)]> exit
Bye
To Import database
[root@CentOS-7 phpMyAdmin]# mysql -u root -p < /usr/share/nginx/html/phpMyAdmin/sql/create_tables.sql
Enter password:
Grant Privileges to Control User
To take advantage of the relational features and other bookmark, we will need to give pma control user with some additional permissions as shown.

Restart Services
We had done with all the setup and configurations of phpMyAdmin now to impliment these changes we have to restart nginx, mariadb and php-fpm services.
[root@CentOS-7 phpMyAdmin]#systemctl restart mariadb.service
[root@CentOS-7 phpMyAdmin]#systemctl restart nginx.service
[root@CentOS-7 phpMyAdmin]#systemctl restart php-fpm.service
Now logout from the previous session and refresh your web browser or open it in new window with same following URL. The error messages at the bottom of the main screen should now gone away.
http://172.25.10.177/phpMyAdmin/
http://localhost/phpMyAdmin/

We had successfully installed and configured phpMyAdmin with all security parameters to an awesome open source tool for the administration of databases. Its so helpful for the newbies and for the professional as it also provide us with its console option to execute queries. So, get ready to setup your own phpMyAdmin environment and feel free to comment us back.
SELinux (Security Enhanced Linux) adalah suatu fitur keamanan yang secara default ada pada keluarga distro RHEL, CentOS, Fedora dan seterusnya. Fungsinya adalah penerapan kebijakan keamanan untuk hak akses aplikasi dalam Linux, sederhananya saja begitu. Dan fitur ini kadang terlalu membatasi sehingga apa yang kita ingin lakukan akan gagal terhalang kebijakannya. Maka dari itu bisa dimatikan saja.
Anda bisa lebih dulu mengecek status SELinux:
sestatusDan kalau balasannya adalah:
SELinux status: enabledBerarti aktif melindungi.
Untuk menonaktifkan SELinux secara permanen anda perlu mengedit konfigurasinya:
nano /etc/sysconfig/selinuxIsinya akan seperti ini:
# This file controls the state of SELinux on the system.
# SELINUX= can take one of these three values:
#     enforcing - SELinux security policy is enforced.
#     permissive - SELinux prints warnings instead of enforcing.
#     disabled - No SELinux policy is loaded.
SELINUX=disabled
# SELINUXTYPE= can take one of these two values:
#     targeted - Targeted processes are protected,
#     minimum - Modification of targeted policy. Only selected processes are protected.
#     mls - Multi Level Security protection.
SELINUXTYPE=targeted
Ubah SELINUX dari enforcing atau permissive menjadi disabled.
Kalau sudah maka restart server anda:
rebootBagaimana kalau kita ingin menonaktifkan SELinux tanpa reboot? Ada solusi sementaranya yakni dengan mengubah modenya menjadi permissive, fungsinya hanya memperingatkan tapi membiarkan aktivitasnya. Jadi nyatanya ya sama saja dimatikan.
Bisa pakai ini:
setenforce Permissive atau ini:
setenforce 0Suka – suka anda pakai yang mana. Tapi saya ingatkan lagi harap anda pahami dulu tugas dari SELinux dan apakah benar tidak membutuhkannya. Kalau saya perlu mematikannya untuk instalasi CentminMod pada salah satu VPS.
Firewalld is a complete firewall solution that has been made available by default on all CentOS 7 servers, including Liquid Web Core Managed CentOS 7, and Liquid Web Self Managed CentOS 7. On occasion, perhaps for testing, disabling or stopping firewalld may be necessary. Follow the instructions below to disable firewalld and stop firewalld.
To disable firewalld, run the following command as root:
systemctl disable firewalld
To stop firewalld, run the following command as root:
systemctl stop firewalld
And finally, to check the status of firewalld, run the following command as root:
systemctl status firewalld
Wait, you actually wanted to Start and Enable Firewalld on CentOS 7? Then hit our tutorial on: How to Start and Enable Firewalld on CentOS 7!
Starting with RHEL 7 / CentOS 7, firewalld was introduced to manage iptables. As such, you will either need to use firewall-cmdcommands or disable firewalld and enable iptables. If you prefer to use the classic iptables setup, then this article will show you how to do just that.
The first step is to stop and mask the firewalld service (i.e., the service you do not want to use):
$ systemctl stop firewalld
$ systemctl mask firewalld
Then, install the “iptables-services” package (if it is not already installed):
$ yum install iptables-services
Enable the service to start at boot-time:
$ systemctl enable iptables
$ systemctl enable ip6tables
You can now either add iptables rules from the CLI (e.g., `iptables -I INPUT ...`) or create/edit your /etc/sysconfig/iptables file to look something like the following (very basic with ports 22 and 80 open):
$ cat /etc/sysconfig/iptables
*filter
:INPUT ACCEPT [0:0]
:FORWARD ACCEPT [0:0]
:OUTPUT ACCEPT [214:43782]
-A INPUT -m state --state RELATED,ESTABLISHED -j ACCEPT
-A INPUT -p tcp -m tcp --dport 80 -j ACCEPT
-A INPUT -p tcp -m tcp --dport 22 -j ACCEPT
-A INPUT -i lo -j ACCEPT
-A INPUT -j REJECT --reject-with icmp-port-unreachable
COMMIT

$cat /etc/sysconfig/ip6tables

*filter
:INPUT ACCEPT [0:0]
:FORWARD ACCEPT [0:0]
:OUTPUT ACCEPT [214:43782]
-A INPUT -m state --state RELATED,ESTABLISHED -j ACCEPT
-A INPUT -p tcp -m tcp --dport 80 -j ACCEPT
-A INPUT -p tcp -m tcp --dport 22 -j ACCEPT
-A INPUT -i lo -j ACCEPT
-A INPUT -j REJECT --reject-with icmp6-adm-prohibited
COMMIT
If you are saving your rules in the /etc/sysconfig/ip{,6}tables files, you will then need to run the following commands:
$ systemctl restart iptables
$ systemctl restart ip6tables
Next, check that the iptables service is “active” with:
$ systemctl status iptables
$ systemctl status ip6tables
Check your iptables rules with:
$ iptables -L
$ ip6tables -L
and that your server is listening on those ports you opened (22 and 80 in the above example):
$ netstat -plant
and you can query the systemd journal for a “log” of the changes you made to the iptables service with:
$ journalctl -f -u iptables.service
$ journalctl -f -u ip6tables.service
If you reboot your server after the above, your iptables rules should be saved and automatically re-loaded again.
That’s it!
sangat bagus
Our this tutorial has a special purpose between developers, because many of our visitors wanted to test react native apps using Local PhpMyAdmin MySQL database and most of them doesn’t know how to? So in this tutorial we would going to create simple User Registration with Local PhpMyAdmin MySQL Database application in both iOS Android devices example tutorial. We would explain each and every step in this tutorial so don’t skip any step read the tutorial to end. Happy Reading 🙂 .
1. The first step is to install the Local PHP server software in your computer, We are using the XAMPP in our tutorial, So if you have n’t install the XAMPP then download from its official website , It’s free.
2. After installing the XAMPP just start the Apache and MySQL server.

3. Create MySQL database and Table:


4. Creating PHP Files:
we have to create 2 php files first one is dbconfig.php and second is user_registration.php .
Code for dbconfig.php file:
This file contains all the most useful information about our server like server database username, host name, password and database name.
<?php
//Define your host here.
$HostName = “localhost”;//Define your database name here.
$DatabaseName = “test”;//Define your database username here.
$HostUser = “root”;//Define your database password here.
$HostPass = “”;?>
Code for user_registration.php file:
This file is used to insert user registration information data into MySQL database table. We would call this file into our react native code.
<?php// Importing DBConfig.php file.include ‘dbconfig.php’;// Creating connection.$con = mysqli_connect($HostName,$HostUser,$HostPass,$DatabaseName);// Getting the received JSON into $json variable.$json = file_get_contents(‘php://input’);// decoding the received JSON and store into $obj variable.$obj = json_decode($json,true);// Populate User name from JSON $obj array and store into $name.$name = $obj[‘name’];// Populate User email from JSON $obj array and store into $email.$email = $obj[’email’];// Populate Password from JSON $obj array and store into $password.$password = $obj[‘password’];//Checking Email is already exist or not using SQL query.$CheckSQL = “SELECT * FROM user_details WHERE email=’$email'”;// Executing SQL Query.$check = mysqli_fetch_array(mysqli_query($con,$CheckSQL));if(isset($check)){$EmailExistMSG = ‘Email Already Exist, Please Try Again !!!’;// Converting the message into JSON format.$EmailExistJson = json_encode($EmailExistMSG);// Echo the message.echo $EmailExistJson ;}else{// Creating SQL query and insert the record into MySQL database table.$Sql_Query = “insert into user_details (name,email,password) values (‘$name’,’$email’,’$password’)”;if(mysqli_query($con,$Sql_Query)){// If the record inserted successfully then show the message.$MSG = ‘User Registered Successfully’ ;// Converting the message into JSON format.$json = json_encode($MSG);// Echo the message.echo $json ;}else{echo ‘Try Again’;}}mysqli_close($con);?>
5. Create a folder name as User_Project inside C:\xampp\htdocs\ like i did in below screenshot and copy the both dbconfig.php and second is user_registration.php PHP files inside this folder. We would now call these files with IP of our local system.
 6. Open command prompt in windows and execute ipconfig command inside it to see your system’s IP address.
Important Note : After executing above command you’ll see many different IP address on your command prompt window, Now if you are connected to WiFi network then you need to copy/select the IPv4 address under Wireless LAN Adapter WiFi block and if you are connected to LAN then select the IPv4 address under Ethernet Adapter.
 7. Start Coding for Application :
1. Open your project’s App.js file and import StyleSheet, View, TextInput, Button, Text and Alert component in your project.
import React, { Component } from ‘react’;import { StyleSheet, View, TextInput, Button, Text, Alert } from ‘react-native’;
2. Create constructor() in your project and make 3 state named as UserName, UserEmail and UserPasswordinside it.
constructor() {super()this.state = {UserName: ”,UserEmail: ”,UserPassword: ”}}
3. Create a function named as UserRegistrationFunction(), Inside this function we would use the fetch() API to insert data into MySQL database, As you can see we are using the URL with IP address mentioned above step with the location of PHP file. After inserting the data successfully it will print the response message coming form PHP file in Alert.
UserRegistrationFunction = () =>{method: ‘POST’,headers: {‘Accept’: ‘application/json’,‘Content-Type’: ‘application/json’,},body: JSON.stringify({name: this.state.UserName,email: this.state.UserEmail,password: this.state.UserPassword})}).then((response) => response.json()).then((responseJson) => {// Showing response message coming from server after inserting records.Alert.alert(responseJson);}).catch((error) => {console.error(error);});}
4. Create 3 TextInput component and 1 Button component inside the render’s return block, Each TextInput will get a value from user and stores in State. We would call the UserRegistrationFunction() on button onPress event.
render() {return (<View style={styles.MainContainer}><Text style= {styles.title}>User Registration Form</Text><TextInputplaceholder=“Enter User Name”onChangeText={name => this.setState({UserName : name})}underlineColorAndroid=‘transparent’style={styles.TextInputStyleClass}/><TextInputplaceholder=“Enter User Email”onChangeText={email => this.setState({UserEmail : email})}underlineColorAndroid=‘transparent’style={styles.TextInputStyleClass}/><TextInputplaceholder=“Enter User Password”onChangeText={password => this.setState({UserPassword : password})}underlineColorAndroid=‘transparent’style={styles.TextInputStyleClass}secureTextEntry={true}/><Button title=“Click Here To Register” onPress={this.UserRegistrationFunction} color=“#2196F3” /></View>);}
5. Creating Style.
const styles = StyleSheet.create({MainContainer :{justifyContent: ‘center’,flex:1,margin: 10},TextInputStyleClass: {textAlign: ‘center’,marginBottom: 7,height: 40,borderWidth: 1,borderColor: ‘#2196F3’,borderRadius: 5 ,},title:{fontSize: 22,color: “#009688”,textAlign: ‘center’,marginBottom: 15}});
6. Complete source code for App.js File :
Screenshots :


First you login with mysql -u root -p and check the current policy rules by:
# SHOW VARIABLES LIKE 'validate_password%';
+--------------------------------------+--------+
| Variable_name                        | Value  |
+--------------------------------------+--------+
| validate_password_dictionary_file    |        |
| validate_password_length             | 5      |
| validate_password_mixed_case_count   | 1      |
| validate_password_number_count       | 1      |
| validate_password_policy             | MEDIUM |
| validate_password_special_char_count | 1      |
+--------------------------------------+--------+
Then you can change any of the above variables at your will:
# SET GLOBAL validate_password_length = 5;
# SET GLOBAL validate_password_number_count = 0;
# SET GLOBAL validate_password_mixed_case_count = 0;
# SET GLOBAL validate_password_special_char_count = 0;
Finally you can create a database and a user accessing it with a simpler password:
# CREATE USER 'laravel'@'localhost' IDENTIFIED BY 'laravel';
# GRANT ALL PRIVILEGES ON *.* TO 'laravel'@'localhost' WITH GRANT OPTION;
# CREATE DATABASE laravel;
# FLUSH PRIVILEGES;
After that you can login with mysql -u user1 -p laravel using password laravel
Tutorial instalasi Moodle ini menggunakan:
Install LAMP server
sudo apt-get updatesudo apt-get update
sudo apt-get install apache2 mysql-client mysql-server php7.0 libapache2-mod-php7.0 php7.0-pspell php7.0-curl php7.0-gd php7.0-intl php7.0-mysql php7.0-xml php7.0-xmlrpc php7.0-ldap php7.0-zip php7.0-soap php7.0-mbstring
Buat database
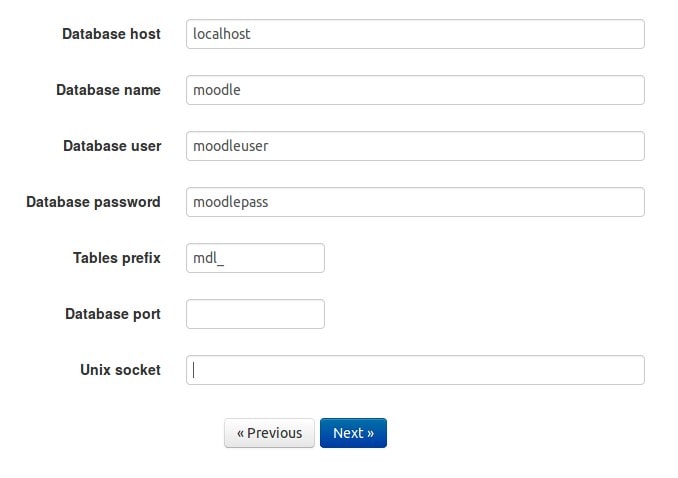
sudo mysql -u root -psudo mysql -u root -pCREATE DATABASE moodle;CREATE USER ‘moodleuser’@’localhost’ IDENTIFIED BY ‘moodlepass’;GRANT ALL PRIVILEGES ON moodle.* TO ‘moodleuser’@’localhost’;FLUSH PRIVILEGES;
Download Moodle
Extract Moodle dan pindahkan ke /var/www/html
tar xzvf moodle-latest-34.tgz
sudo mv moodle /var/www/html/
cd /var/www/html
sudo chown -R :www-data moodle
sudo chmod -R 775 moodle
Buat direktori moodledata
cd /var/wwwcd /var/www
sudo mkdir moodledata
sudo chown -R :www-data moodledata
sudo chmod 775 moodledata
Akses http://localhost/moodle atau http://IP_SERVER/moodle
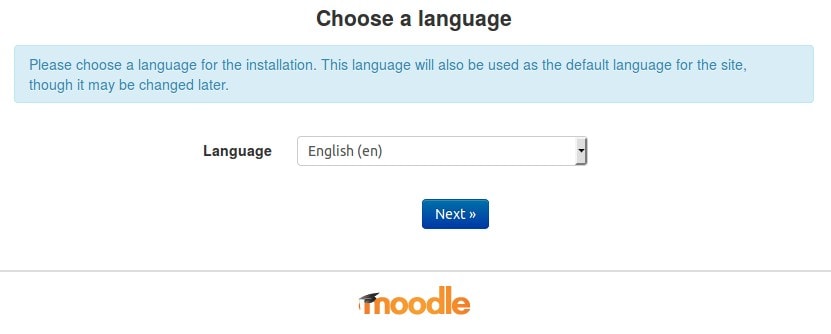
Pilih bahasa, setelah instalasi masih bisa diganti
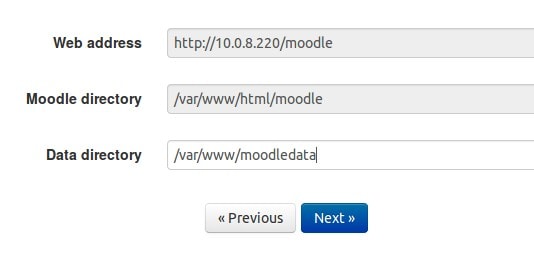
Konfirmasi direktori instalasi dan data
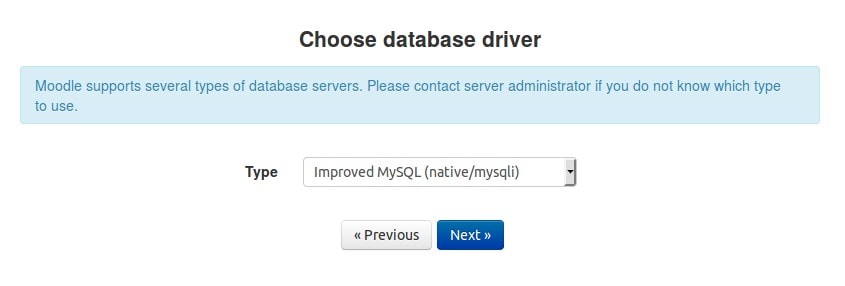
Pilih database driver mysqli
Database settings
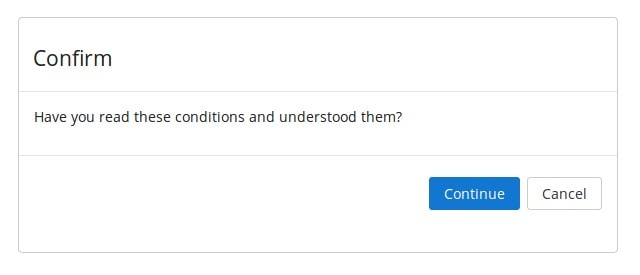
Konfirmasi lisensi
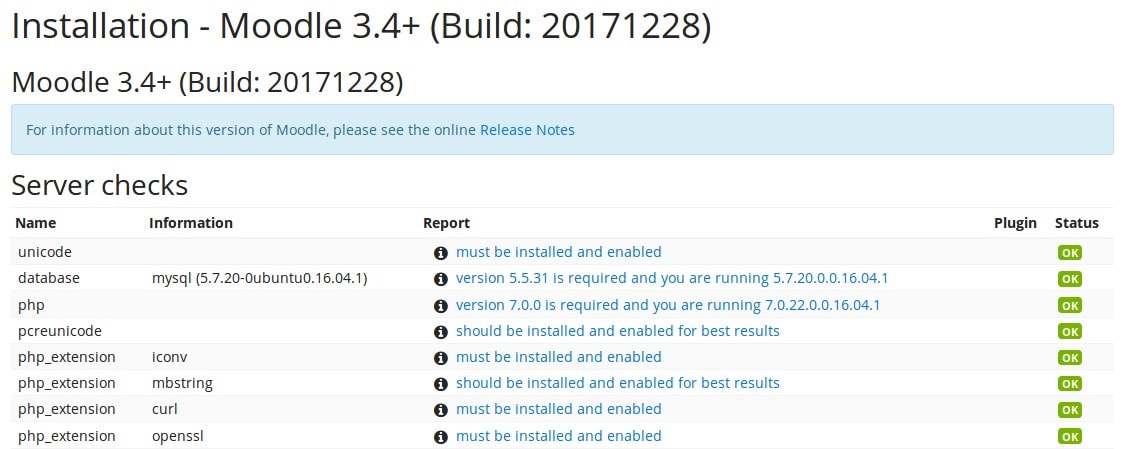
Pengecekan kebutuhan server, extension PHP. Jika ada yang kurang, install extension dan restart apache. Misalnya kurang extension mbstring, curl, dan openssl cara installnya
sudo apt-get install php-mbstring php-curl php-openssl
Restart apache
sudo service apache2 restart
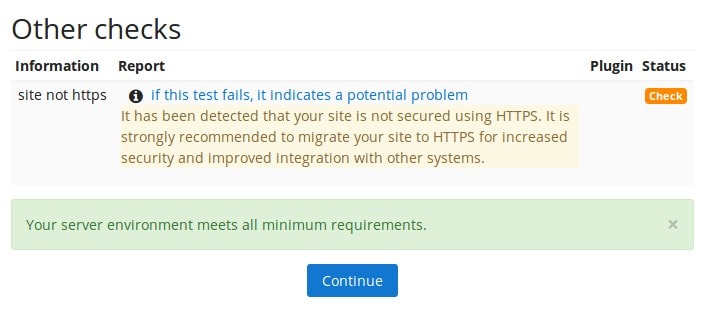
Kemudian reload kembali halaman ini
Jika semua environment sudah terpenuhi ditampilkan pesan Your server environment meets all minimum requirements..
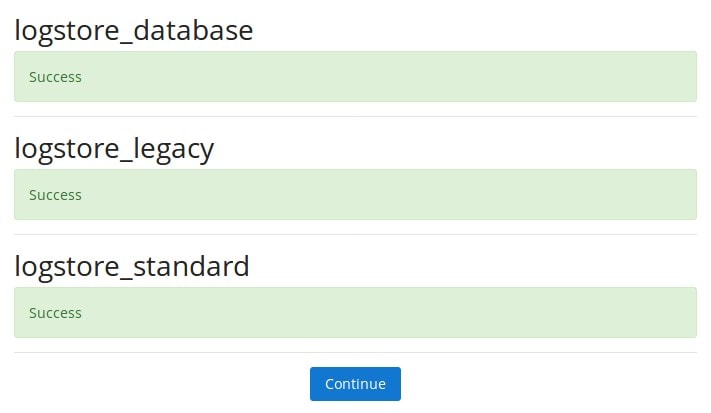
Proses instalasi dimulai. Cek semua statusnya apakah Success atau tidak
Isi informasi General.
Password minimal 8 karakter, terdapat 1 karakter angka, 1 karakter huruf kapital, dan 1 karakter spesial seperti * atau #.

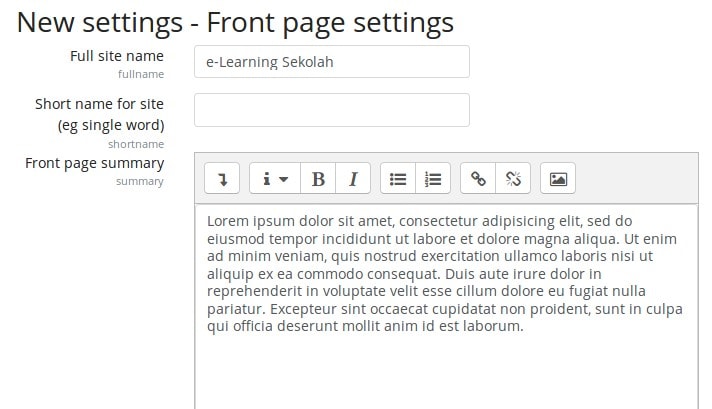
Isi Front page settings
Jika berhasil, langsung masuk ke Dashboard

selamat mencoba 🙂